My Guide to Food Photography Gear

It must be the holidays! I’m getting tons of requests for lighting and camera recommendations, so I thought perhaps I should do a little post on my gear and photo-centric wish list. (plus, I just updated my Amazon Shop, which includes most of this stuff… I’ll keep it updated with my latest finds.)
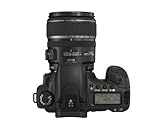
I’m still shooting with a Canon EOS 20D for most of my shots. I love this camera… it’s a great size and produces beautiful shots. Of course, the Canon EOS 5D is on my wishlist… but I think it’s still many months off.
In the studio, I shoot with one of three lenses almost exclusively: the Canon EF 100mm f/2.8 Macro, the 50mm f1.4 and the 45mm f/2.8 Tilt Shift Before I got the tilt-shift, I used the 50mm quite frequently… but it’s so close to the 45mm, that I rarely use in the studio anymore. 75% of my shots are now with the 45 T/S. It is an amazing lens.
Outside of the studio is a different story. For shooting on location with minimal gear, the 50mm 1.4 is a must have. Nothing else handles low light like this lens (ok, the 1.2 version would, but can anyone afford it?). I also love to take the 24-105mm f/4L, which is a great lens for well-lit shots and gives a bit more flexibility for framing. Just the little bit of zoom handles most of the shots I want to take. If I’m up for bringing a 3rd lens with me, then it’s the 200mm f/2.8L , which is my favorite telephoto lens… cheaper than the 70-200 2.8 and a bit crisper.
I also have some accessories. My favorite is the Canon EP-EX15 Eyepiece Extender, which lets me look through the view finder without always smudging up the display on the camera. Such a simple little thing, yet it makes me so happy.
I also love my Remote Switch, which lets me take photos on slow shutter speed without having to mess around with the timer. Of course, I’m sure I’d also like the Wireless Radio Remote too.
A good portion of my lighting is free, or nearly so. Big windows and french doors that face south and west. I’ve covered the southern windows with a frosted vellum that is available at art supply stores by the roll. That, and a few big sheets of styrofoam board are my lighting solution for about 75-80% of my photos.
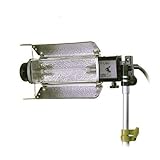
When I don’t have enough light, I use the Lowel Tota system, which is a reasonably priced start into studio lighting. The Tota-Pak includes a 750W tungsten halogen lamp with bulb, a stand and an umbrella is regularly $280, but I just noticed that it is on sale for $194 on Amazon right now. The V-Light Pak, which is 500W is on sale as well for about $5 less. I haven’t used them yet, but I recently got the Tota-frame and Assorted Lighting Gel Set for the Tota-lamps as well.
I also have a very small fresnel light by Mole-Richardson that I use only for special cases that I need just a little bit of extra light in one spot. It’s fairly dramatic lighting, esp with all the accessories you can put on it.
My tripod is a set of Manfrotto legs and a Really Right Stuff ball head. This is a heavy duty studio tripod… the kind of thing you wouldn’t want to throw into a backpack and take with you, but excellent in the studio. I also have a great arm that clamps onto my tripod for holding onto miscellaneous gear like reflective discs.
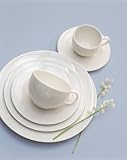
White dishes are my most frequently used, but I have quite a few solid color things as well. And some dishes with Asian prints. But, if you are just starting out, make sure you have a good variety of white plates and bowls, and some simple flatware. Forks appear most frequently in my shots, quickly followed by spoons. I tend to use the smaller flatware more frequently, but I also have a couple of interesting serving tools, like a copper ladle and coffee scoop.
For backdrops, head to your local fabric store. You can get some good deals on cloth paying by the yard. Who cares if the edges aren’t finished when they don’t show up in the photo. Also, hand-made paper found at arts supply stores or card stores makes for some really nice backdrops, esp when you have a working sweep.
For a more finished look, I also have a fairly wide selection of towels and linen napkins that can be folded and placed under or around dishes. I prefer simple patterns and solids, in fairly light colors for these… but I do have the occasional piece that is quite bright and playful. I find most of my linens in the sales racks.
For styling your food, a good set of tools to have on hand are a pair of chopsticks (for pushing, poking or picking things up), tweezers, a pair of manicure scissors, some cotton swabs, a spray bottle (with water) and plenty of paper towels. Joe Glo wipes are also really good for little clean-ups.
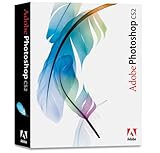
I reference Photoshop CS2 for most of the articles on Still Life With. It’s really, really expensive but it’s also just about the only tool that you can use to do advanced editing. If you don’t need advanced editing, just go with Photoshop Elements. If you outgrow it, Adobe is generally pretty good with giving upgrade discounts. Or, if you are really just getting started, you can always go with iPhoto on the Mac or Picasa on the PC without any outlay of cash.
My newest software necessity is Phase One’s Capture One Pro. It’s a raw workflow tool that lets me shoot tethered to my Mac. I have a long USB cable that connects my camera to my Mac, and as soon as I take the photo, it’s on my laptop and I can see it full res to make sure that I’m getting what I wanted. It’s completely changed the way that I shoot and edit, and I couldn’t be happier about it. But, it was a serious expense. Unless you are going pro, there is no reason to pay that kind of money. That said, I’ll have more info on shooting tethered in an upcoming post.
BTW – I’ve been thrilled to get so many mails asking me my opinion on this stuff. I’m very happy to help… so if you have other questions, do feel free to shoot them my way!
Technorati Tags: camera gear, Food, Food Styling, Photography, shopping
I’m actually trying to decide between the Canon 20D and the Canon Rebel XTi right now – any thoughts on that?
I’ve never used a Rebel, but it’s basically the same insides… just a lighter weight body. The XTi actually is slightly higher res than my 20D, which is nice. But, you’ll have to like the feel of it. Is there a camera store you can go into to pick one up and handle it to compare? I know I like a slightly more substantial feel, but that’s just a personal preference.
-L
Lara, YAY! This is an excellent post!
I am the greasiest man alive and had no idea about the Eyepiece Extender. Ever since getting my 5D a few months ago it always remains smudgy, and the fact that the view screen is larger makes it dirtier. I am running to get one today!
Also, I’ve used Canon software to shoot tethered to my Mac but nothing comes close in terms of ease of convenience and features as Capture One Pro. Now that I have it I cannot imagining shooting without it, and if anyone has concerns over the expense I must say it’s well worth it (and that overlay feature? HEAVENLY!)
Thanks for all this information… STW is such an amazing resource and the best place for info!
I find your blog most interesting! I like the ‘floating sweep’ idea & will try that on my next food photo. I’m new to food blogging as well as food photography. Do you have an area where I can subscribe to your blog?
Cheers!
Heather
Good info, thanks! I just got the 50mm 1.8 (the starving artist-effect)…couldn’t justify the 1.4, but for $69, the 1.8 is quite a deal. Can’t wait to play around with it when it arrives in January.
BTW: I have a Rebel and the good thing about it is it’s a bit easier to pop into a shoulder bag. Especially for someone like me who hates schlepping heavy, or bulky, things around.
After a whole lot of research and fondling cameras in the store, I decided to go for the Canon 30D body and a pair of lenses (50mm/1.4 and 100mm/2.8 macro). I think I’ve done reasonably well with my S400, but it will be nice to have more control.
Hi
I’ve just found your blog, and it is the most useful food photography blog I think.:) Thanks for the good advise.
could you please tell a bit more about the tilt-shift lens? what is the difference to e.g. just changing the angle of view? thanks 🙂
This is incredibly useful information. Thanks for being so generous in sharing it with the blog community.
Ken & I are going to try to launch some kind of blog together & want to have a more prefessional look. I can’t wait for him to read your entry.
Happy New Year!
Catherine
Hi!
Thanks for the post.
My sister and I recently decided between getting a Nikon d50 and a Canon Rebel XTi (but not she’s deciding between the d50 and the d80).
I wish I could take such great pictures but, maybe practise (and my camera back) might help.
Do you mind if I ask, why did you first go with Canon?
Thanks Matt. The eye piece extender is awesome. I love mine!
Heather – sure… you can subscribe to it with any newsreader! The feed URL is: http://stilllifewith.com/feed/atom/
Thanks David! Good to hear about the Rebel. Personally, I like the heft… but I certainly can understand folks wanting something lighter.
Danielle – I’m so excited for you! have fun!
Thanks Sue!
Laura – Tilt-shifts are a bit tricky to explain. I’ve got it on my “to do” list to write up a post on it… hopefully soon.
Catherine – Sounds fun! Can’t wait to see the new blog. Be sure to let me know where it is.
Lilandra – Good question, but I don’t have too good of answer. I went with Canon because my husband had a Canon SLR and a bunch of lenses. When I got my first DSLR, it made sense to stay with it so I didn’t have to start over with a lens collection! Plus, I’ve always been quite happy with the camera bodies.
Cheers all! Thanks for your great comments!
-L
Hey, that’s the best reason!
Which is why my sister and I are deciding to go with the same system (and why we’re having Nikon/Canon wars).
But, I don’t think I’ll ever get to try out a body before I buy it. Oh well. I’ll be happy regardless.
I really like your site and now intend to start at the beginning and keep reading.
Lilandra – you might check out ZipLens for a body rental if you are in the states. I was very pleased with their service, and it’s a fantastic way to try out a lens or a body to see if you like it.
L – nope, not in the states which is the problem 🙁
yet if i want a camera i think i have to buy it in the states like on vacation or something
but thanks!
Dear L,
Thank you so much for sharing all the information.
I would like to improve my food photo results. At the moment I am using Canon 350 D with lenses : EF-S 18-55 and 70-300 mm F4-5.6.
I think I have to invest more on my lense collection, could please recommend the lense I should buy ? Thank you so much.
Hi L,
For my food photography, I was looking for Lowell Tota but I couldn’t find it, here in Turkey. I wonder what you think abaout Omni Light.
Thanks.
SyL – The main thing I’d recommend is a macro and something fast. I prefer prime lenses, like the 50mm 1.4 and the 100mm 2.8 macro. Look for lenses that let you get fairly close to the subject… at least a foot, if not closer.
Basak – The Omni is a step up from the Tota, so it should be a good choice. I haven’t used it, but taking a look, make sure you get the barn-doors so you can control where the light goes.
-L
Thank you so much for your answer.
Sun is not always shining, unfortunately. So I need some other lights.
I’ve been using only sunlight and reflectors while shooting food, so I’ve doubts about other lights.
With no sunlight, can we still get the natural daylight effect while using this Omni or Tota light and the umbrella?
Thanks for your time and all advices. Please don’t hesitate to ask me something or want something from me.
Cheers,
BaÅŸak.
L,
Wow, great blog. I thought your readers would be interested in the machine I’ve invented specifically for creating beautiful looking imitation steam for food shots, the Genuine Imitation Steam Controller. This effect is really for people with decent budgets and has mostly been used for motion photography of food in the past. Once print shooters use it, though, they’re hooked. Check out my website about the rig at
http://www.steamcontroller.com
Well done, impressive blog!! Just one thing I want to ask, how often do you use the Canon 100mm Macro? I will definitely get the 50mm 1.4 soon, but I wonder if I really need to spend more for the 100mm Macro. I would really appreciate your suggestions. Thanks a lot!!
I’m trying to upgrade cameras, but need to tote it to restaurants as unassumingly as possible. Wondering what everyone thinks of the Canon SD 1000 vs. Sony DSC-TK? Any thoughts? Truly appreciated!
Danyelle
I noticed that you talked about having the 5D on your wishlist — my advice: Hock the kids, house, spouse…whatever it takes, and buy it! You’ll be amazed at the difference in clarity, color, sharpness at your pictures. Also, get accustomed to shooting in RAW, and process your images in Photoshop CS3 with Camera Raw 4.1 — it’s almost like shooting with film.
Best of luck in your endeavours:
Michele Johnson
MW Johnson Photography
I have the same question as Myth Mok. If you had to choose between the 50 mm and the 100 mm for shooting food pictures for a foodblog, which one would it be? I only intend to buy one.
Thanks,
Maaike
Hi Maaike,
well, if I only get one of those two, I’d probably go with the 50mm which is a better all around lens. But, you will lose out on macro functionality, which for food is challenging.
If you can only buy one lens, then I’d probably say skip both of those and get the 60mm 2.8 macro which should give you some of the best of both of the 50mm and 100mm. Of course, that means you still need to buy those at somepoint, but for the time being, you’d have macro capability and a good regular lens.
Hope that helps!
-L
Hey L,
Do you have any comments to add to all the critical comments on the amazon sites for the eyepiece extender? They say it doesn’t extend that much, their noses still touch, and that it reduces the view too much (30%?).
Thanks again for putting these gear guidelines out here. They really give a persona good place to mentally start from!
cheers
I find it helps and I don’t have an issue with it reducing the view… however, I do have a problem with the it popping off if it is knocked slightly, which has lead to me buying far more of them than I would like… so I’ve kind of stopped bothering with them at this point.
Great list! Have you considered doing a new one for 2009? I’d love to hear your thoughts on the most recent stuff out there, what with the holiday season and all. 🙂
that was an awesome post…
what fstops normally u use to shoot on ? for the sharpness of images
Hi Anu – There isn’t one answer to this… the aperture setting will greatly depend on the need of the particular shot. However, I do tend to stay in the wider aperture range (2.8 to 6.3) which gives me the softer backgrounds that are typical of my style.